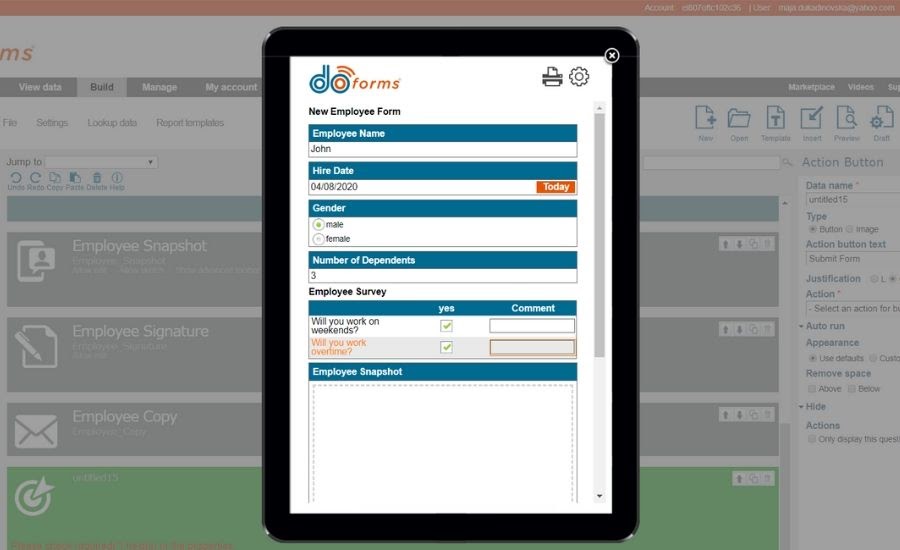
We are going to show you how to build a mobile form using doForms, step-by-step. When you’re finished, it’s going to look like this:
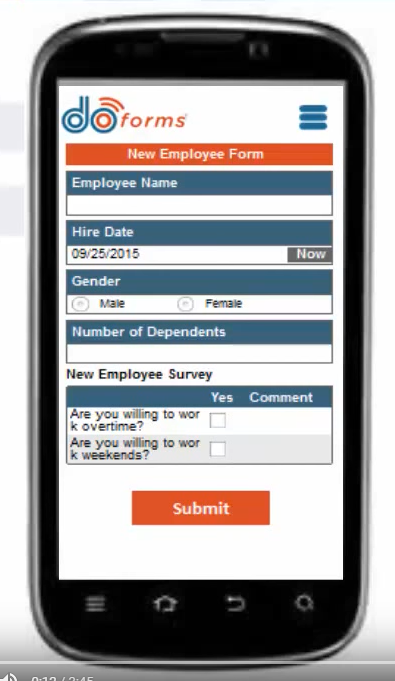
doForms mobile form screenshot
Let’s get started!
Table of Contents
Do you wish to try doForms free for 30 days? Click here!
Creating A New Mobile Form
When you log into your doForms account, this is the first screen you’ll see:

From here, simply click on “Build Forms”.
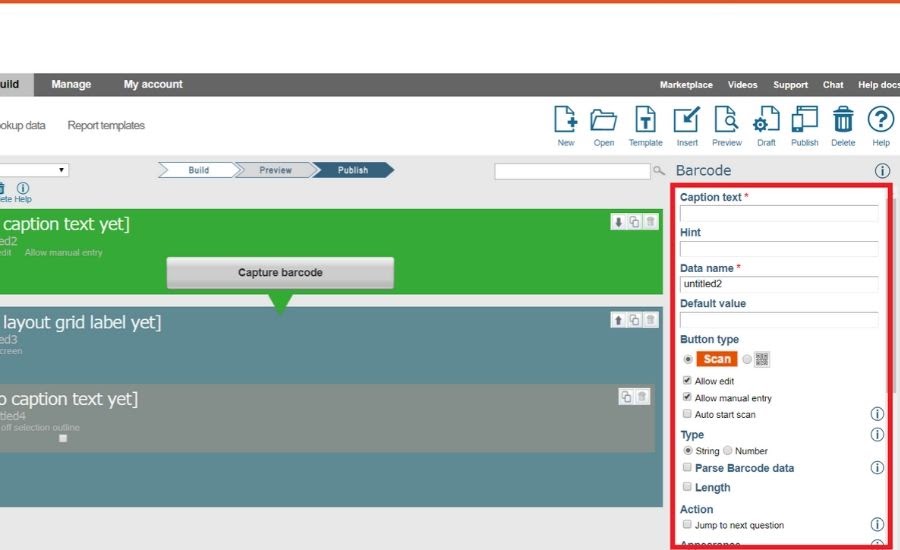
On the left-hand side of the screen, you’ll find the form-building components.
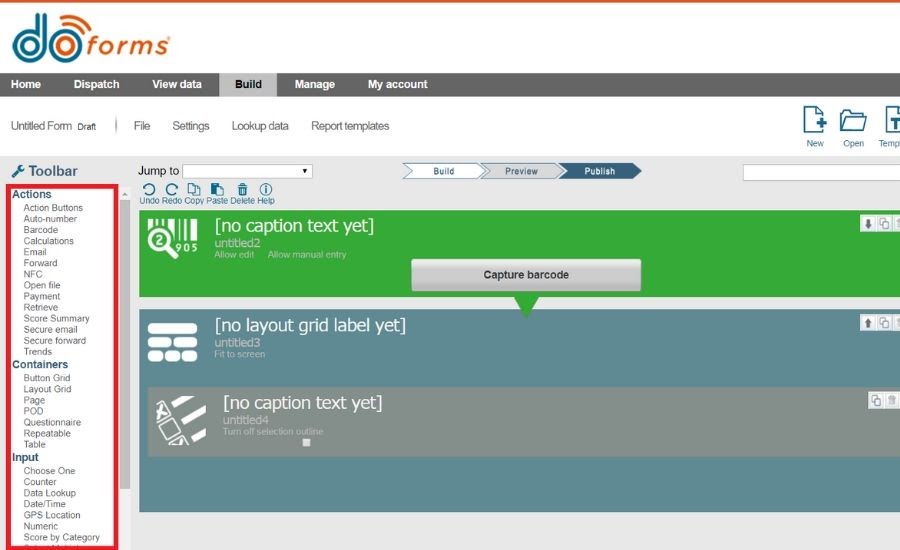
The grey area is where you will place each of your components into the form.
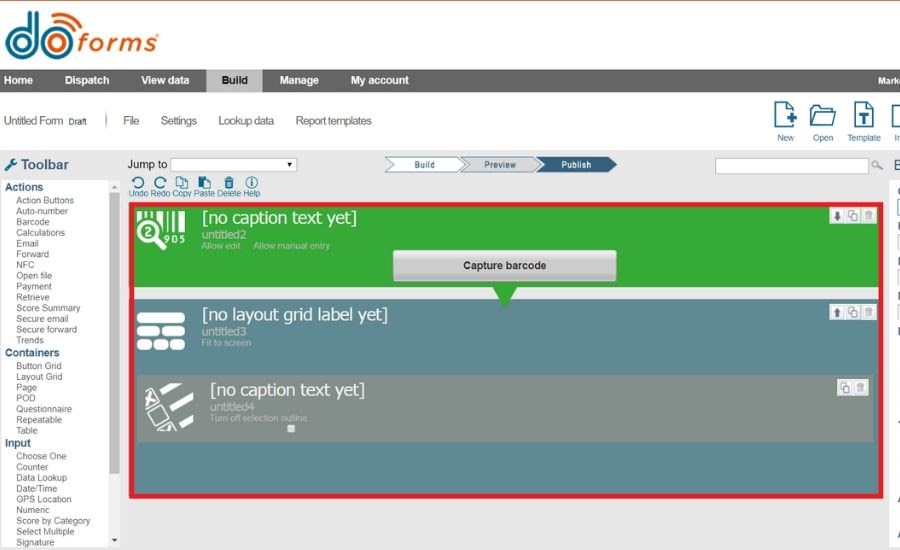
On the right is where you can configure each component in your form.
To get started click on the new button or click “Open” to work on the form you’ve already started.
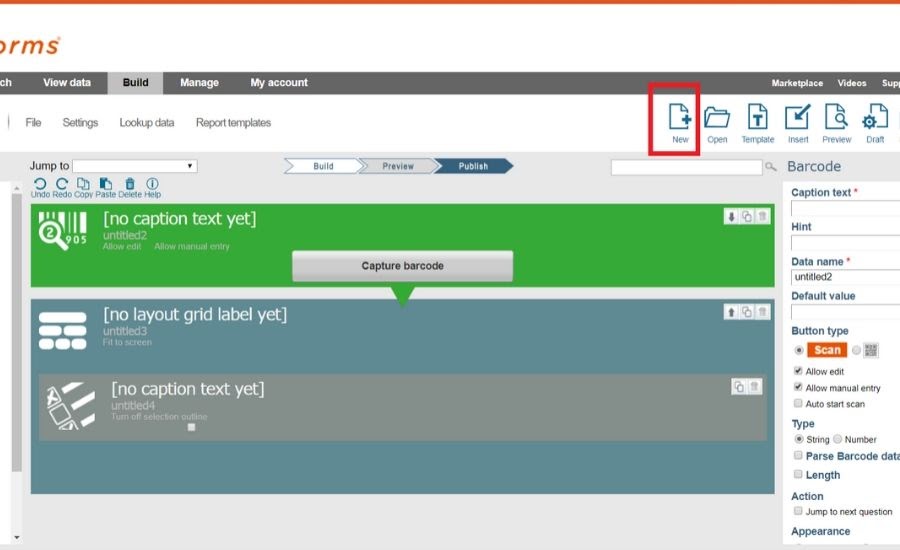
Click on the “New” icon
Adding Components To Your Mobile eForm
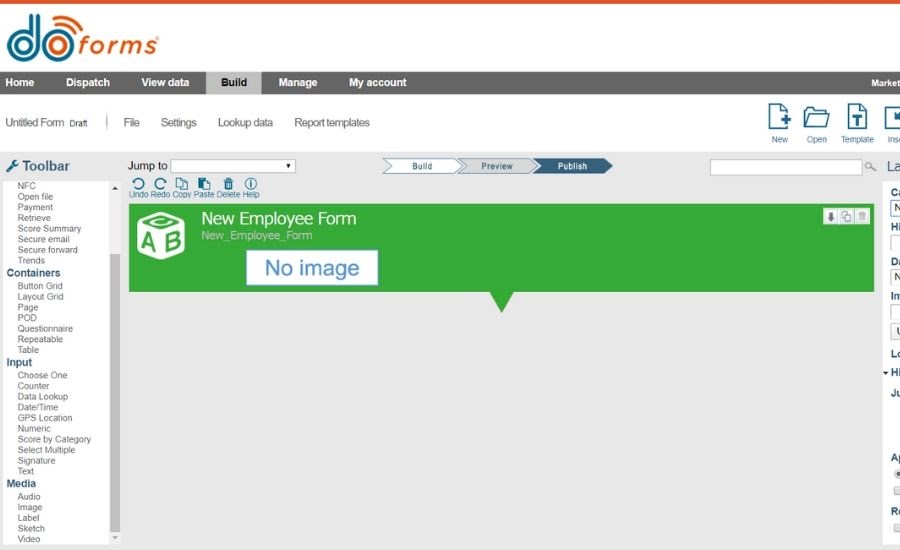
Let’s start by adding a label and naming it “New Employee Form”.
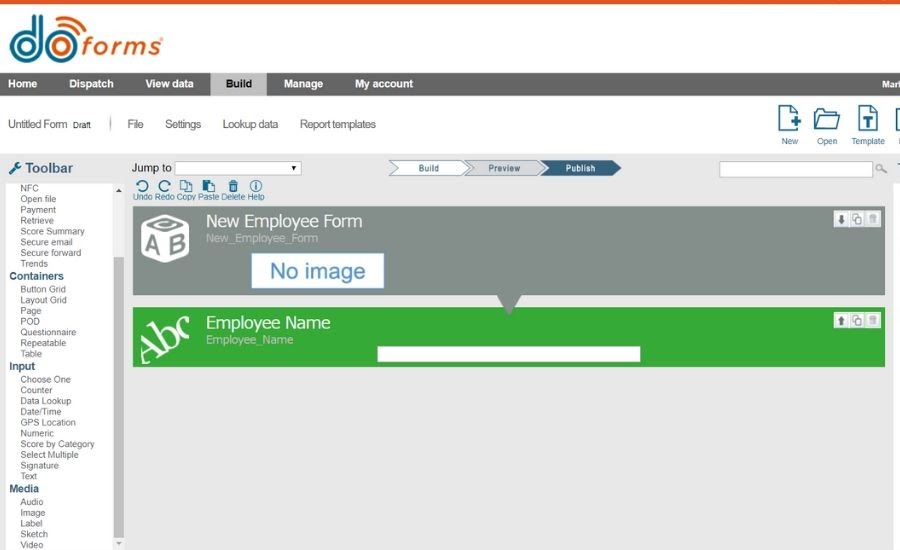
Now let’s add a text box so we can add the employee name.
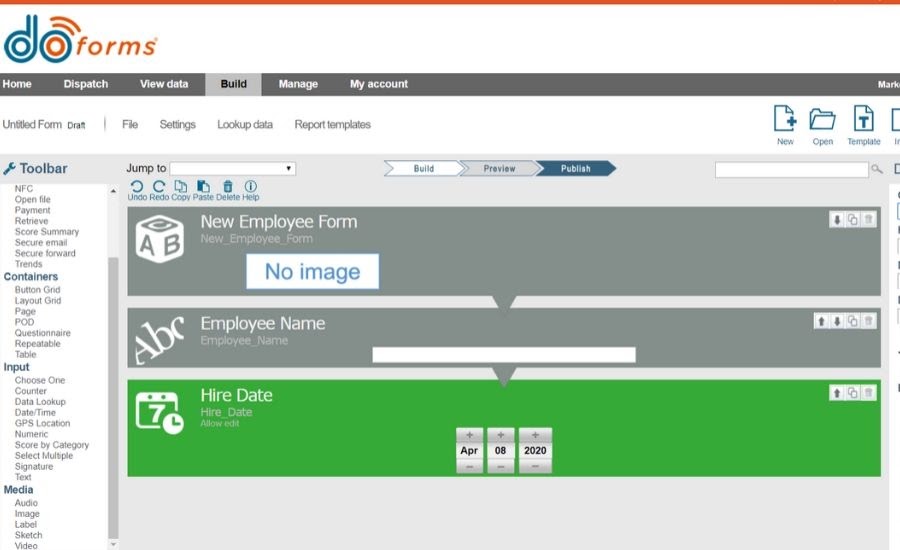
Next, drag up the date function so we can add the employee’s date of hire.
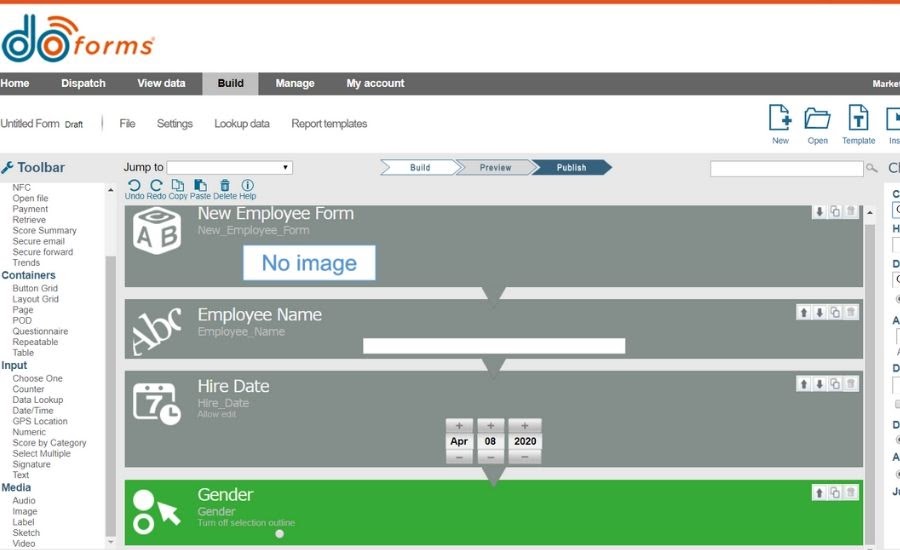
Now let’s capture the employee’s gender. We can do this by using the “Choose One” function and setting the answers to “male” or “female”.

To capture the number of dependents, we’ll use the “Numerics” function.
Using Your Mobile Electronic Form To Create An Employee Survey
Now let’s get a little more sophisticated by creating an employee survey, using the Questionnaire function.
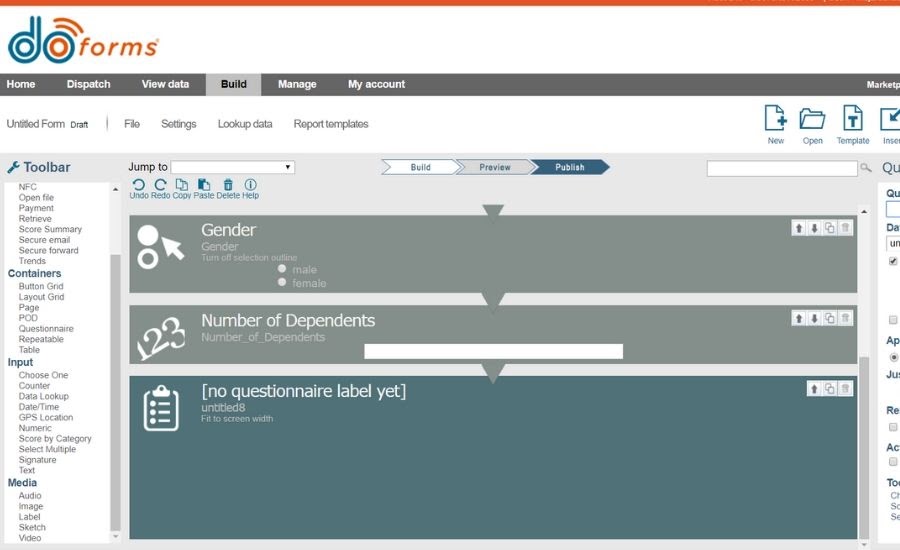
Start by adding a caption and then click on the “Append comment” box so you can add a comment to each question in your survey.
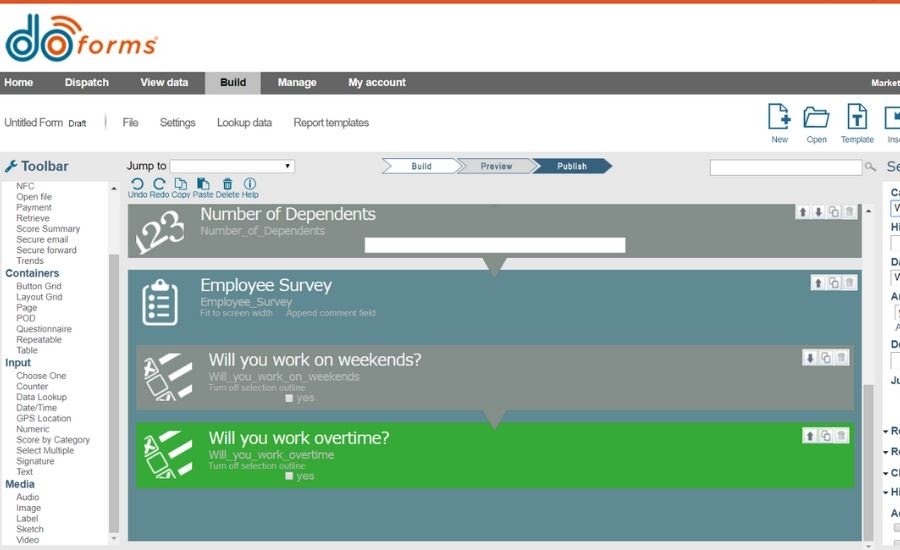
To add survey questions, you can use the “Choose One” function, the “Select Multiple” function or the “Score” function.
For this example, we are going to use the “Select Multiple” function, setting the answer to “yes” and the caption to the question you wish to ask.
Then, you simply use the duplicate button to create additional questions, changing the caption for each question.
Adding additional questions.
Finalizing Your Mobile Form
Adding pictures to doForms is easy: simply use the “Image” function and use the caption to give your picture a name.
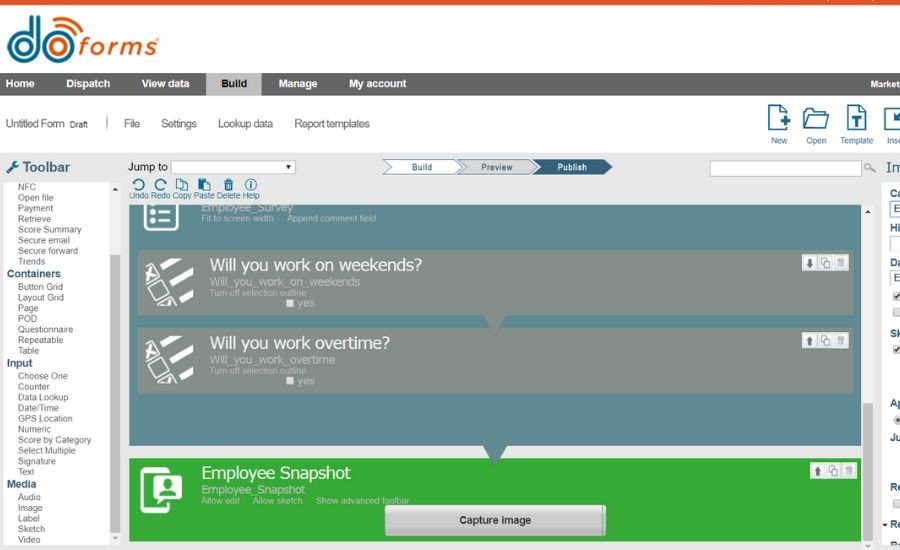
Adding an image.
Next, you want the employee to sign the form. Click on the “Signature” function. You can use “Hint” field, to add any legal disclaimer that might be required.
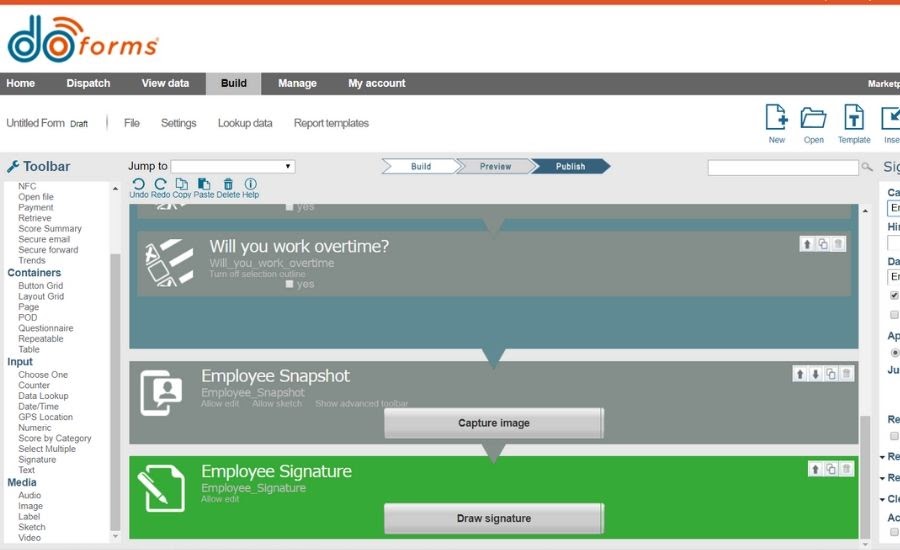
Adding signature
You can automatically send the form as a .pdf using the email function. All you need to do is capture the email address. Remember, you can use “Hint” in most of the functions to provide additional instructions on how to enter questions.
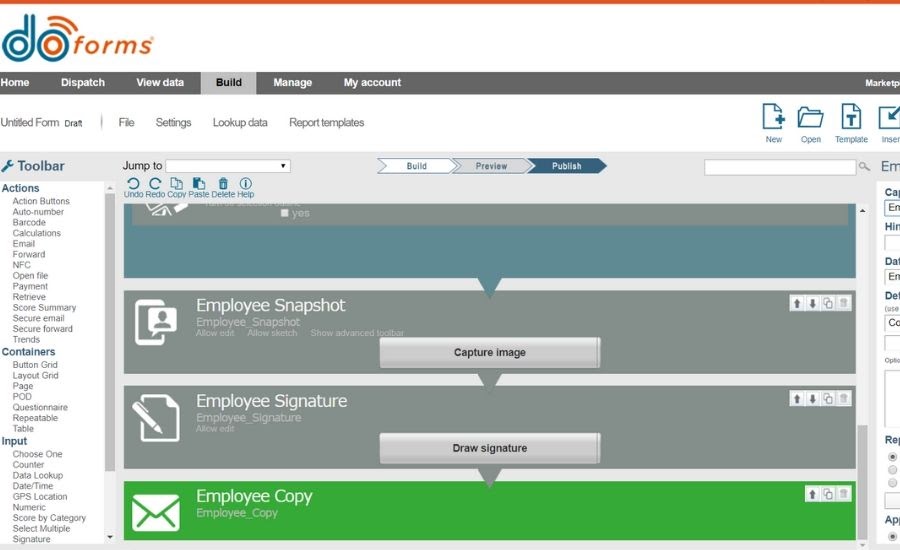
Sending a form as a PDF
Once your form is complete, add an action button, give the button a title and then choose the “Send and Save” action.
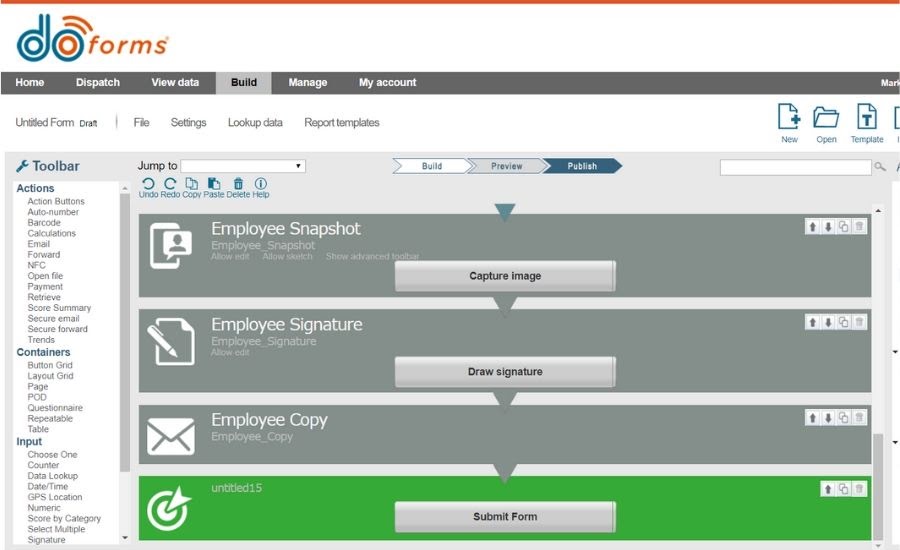
Adding an action button.
Previewing And Publishing Your Mobile Form
To get a sense of what your form will look like, and how it will function on a mobile device, click “Preview”. You can enter data in the Preview, so go ahead and try out your form.
Mobile form preview
Once you’re happy with your form, hit the “Publish” button, give your form a name and click “Save”.

Publishing a form
Then, pet yourself on the back – you’ve built your first doForm!